Making a Custom Gun
This tutorial uses custom projectile objects, not the projectile lancher. For a tutorial on that, look for a tutorial on that instead.
Create a model representing the bullet. This can be anything, but for now we'll just use a simple yellow line.
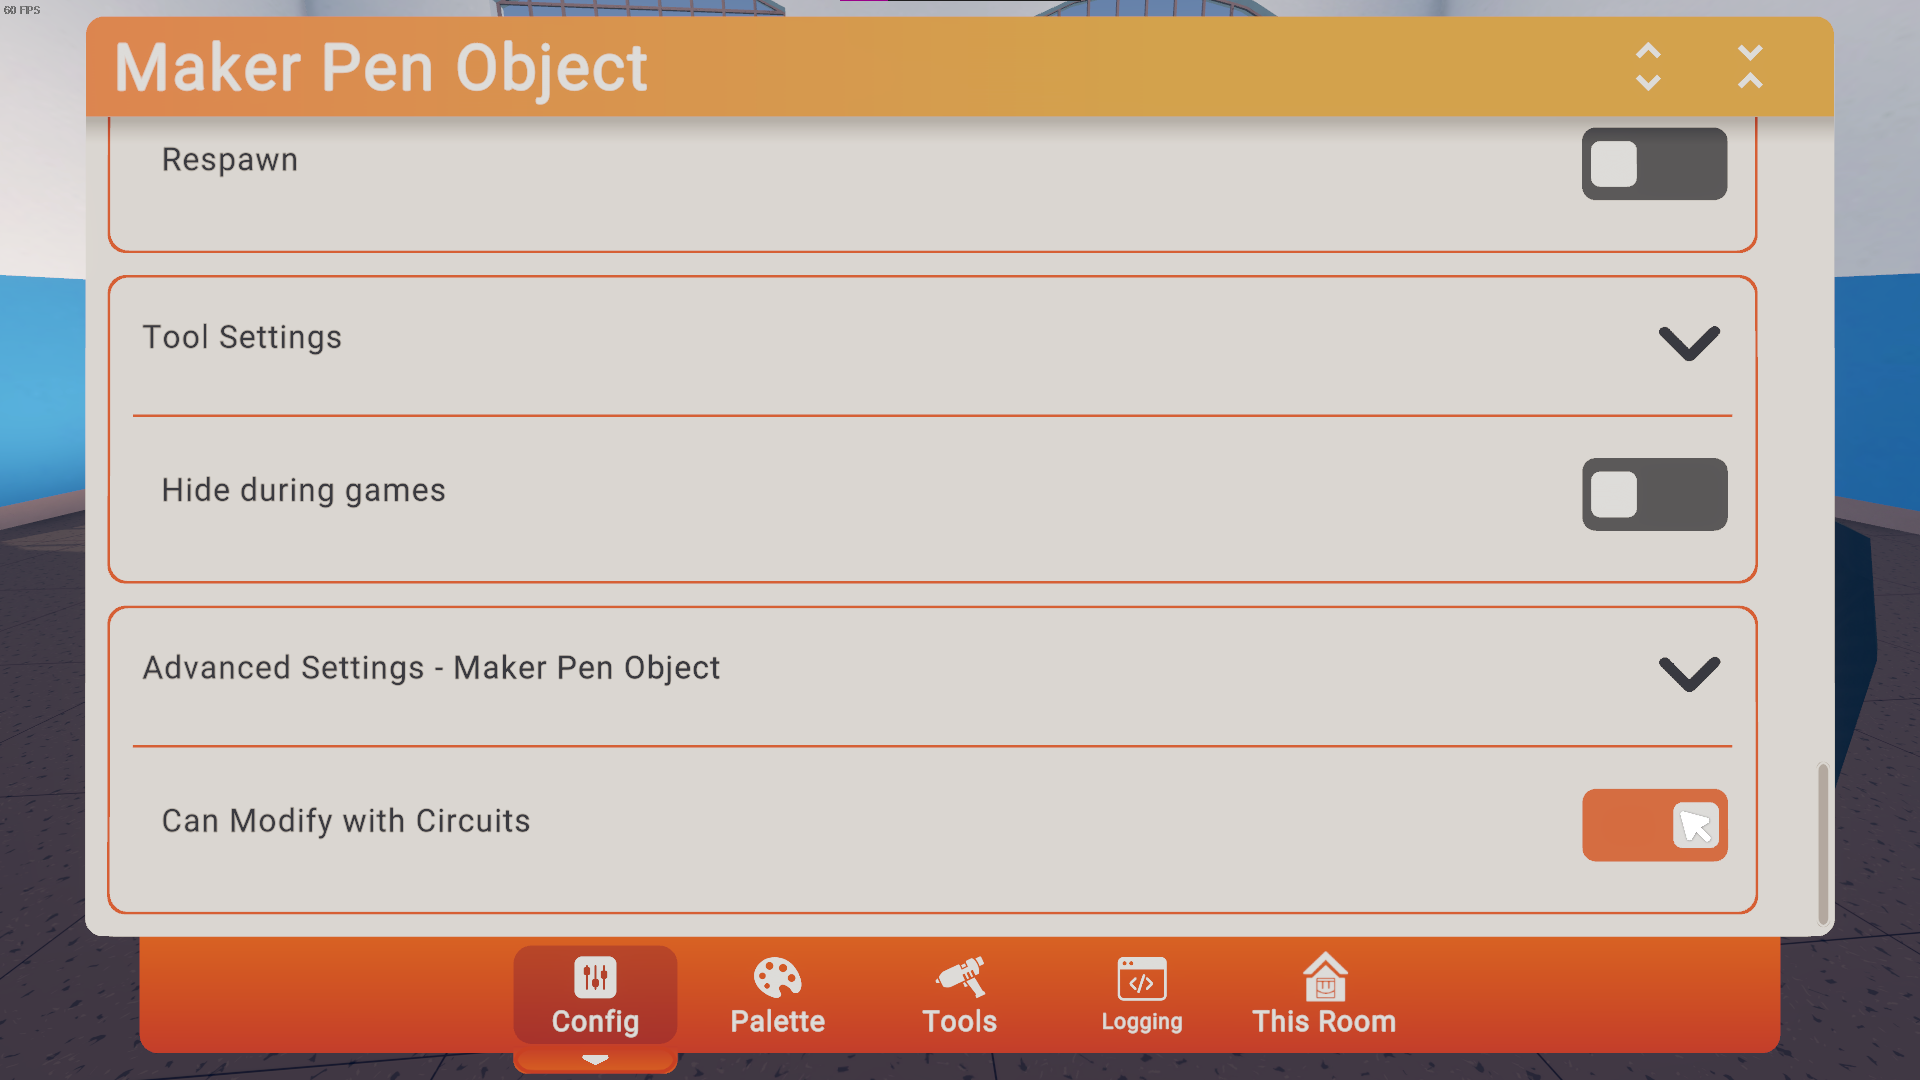
Configure the bullet, and set the physics mode to Physical. Give it a tag of whatever you want, but I'll use Bullet.
Go to the very bottom of the config menu, and turn on Can Modify with Circuits.
Without this, it won't work and will throw an error when we get to the circuits.

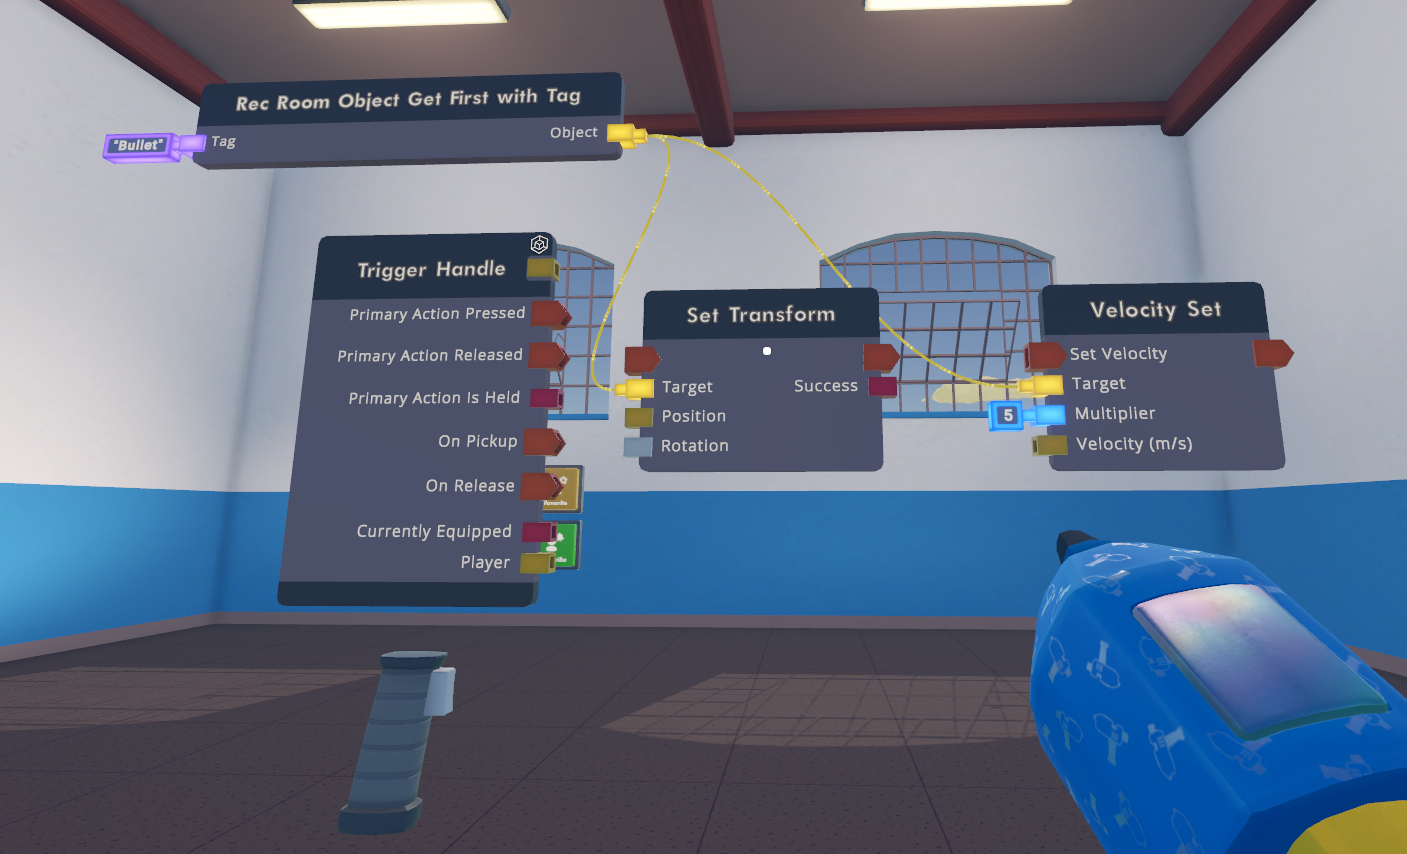
Spawn a Trigger Handle, and then spawn these chips:
Set the Tag input on the Rec Room Object Get First With Tag chip to the tag defined earlier. In this case, Bullet.
After this, connect the output to the Target inputs on the other two chips. It should look like this.

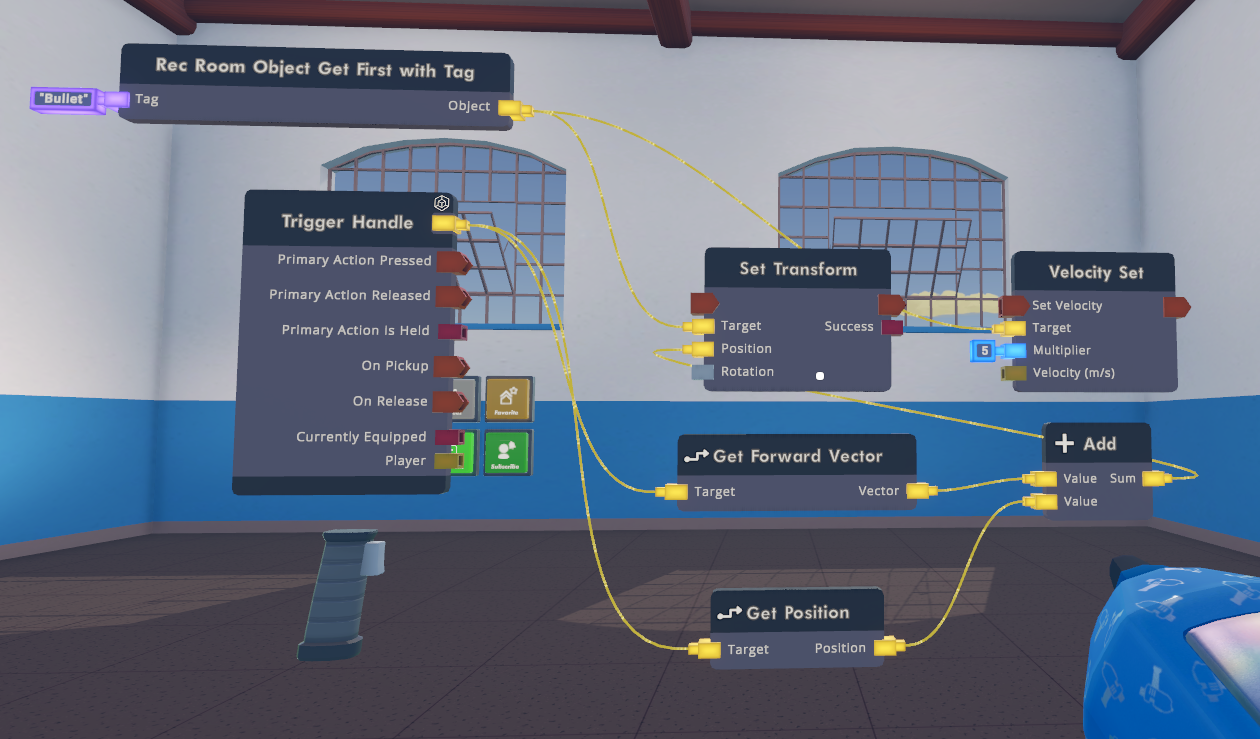
After this, spawn these chips:
Connect the Get Forward Vector chips inputs to be connected to the yellow output at the top of the Trigger Handle board. After that, circle the outputs of the two chips into the Add chip. It should look like this.

Connect the output of the Add chip and connect it to the Position input on the Set Transform chip.
Describing this, it gets the position of the gun, and sets the position of the bullet to it. However, the forward vector is the rotation of it, so it adds that to the position, making it slightly in front of the gun itself. This way, it should look like it comes out of the front of the gun.
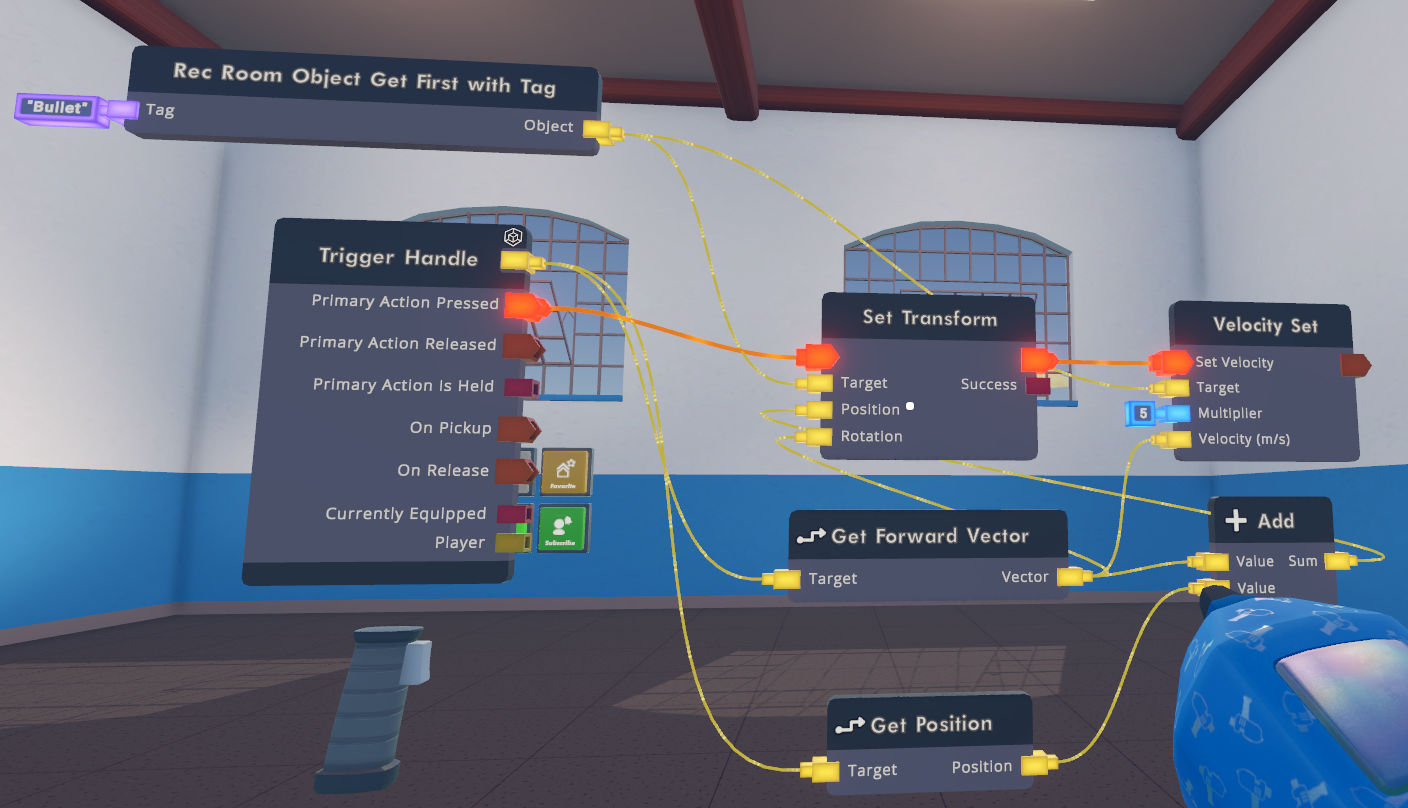
Connect the output of the Get Forward Vector chip to the Rotation input of the Set Transform chip.
After this, set the Velocity (m/s) input of the Velocity Set chip to the output of the Get Forward Vector chip.
You can use the Vector3 Scale chip to increase/decrease the speed of the bullet!
Connecting all the Exec ports together should give you a result like this!

If you pick up the trigger handle, and activate it, the bullet should come out of the tip of the trigger handle, and then move forward!
Congratulations! You've made a custom gun!